Assignment of event handler - Cape.JS Primer
On the previous lecture, I explained how to initialize the component data of Cape.JS via Ajax.
On this lecture, I’ll explain how to assign the event handler to HTML element.
Open app/assets/javascripts/todo_list.es6 on the text editor. At this time of now, the method render() is defined as following.
  render(m) {
    m.ul(m => {
      this.tasks.forEach(task => {
        m.li(m => {
          m.label(m => {
            m.input({ type: 'checkbox', checked: task.done }).sp();
            m.span(task.title);
          });
        });
      });
    });
  }
Rewrite it as following. (add a line behind m.label...)
  render(m) {
    m.ul(m => {
      this.tasks.forEach(task => {
        m.li(m => {
          m.label(m => {
            m.onclick(e => this.toggleTask(task));
            m.input({ type: 'checkbox', checked: task.done }).sp();
            m.span(task.title);
          });
        });
      });
    });
  }
The line is added is following.
m.onclick(e => this.toggleTask(task));
This sentence assigns this.toggleTask(task) as the event click handler. The object it the element added to virtual DOM right after, which is the check box.
m.onclick((e) => { this.toggleTask(task) });Next, let’s define the event handler and rewrite app/assets/javascripts/todo_list.es6. Insert the following code to below the method’s render() definition.
  toggleTask(task) {
    window.alert(task.id);
  }
It displays the warning dialog just to make sure the event handler can reacts on the click of checkbox.
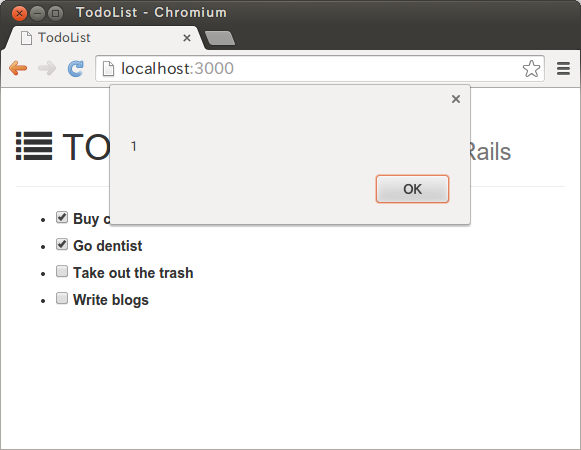
Now, let’s make sure it works well. Boot the server and open http://localhost:3000/ on the browser. By clicking the first checkbox, it displays “1” like following in the warning dialog. This is the value of the column’s id task.

That’s all for today. On the next lecture, I’ll explain how to update the value of the task’s column done by using Ajax call of this event handler.