Show the form for new task - Cape.JS Primer
On the previous lecture, I explained the important concept of Cape.JS, the data store.
On this lecture, I’ll explain how to display newly added form of the task.
Before going in to the point, let’s do refactoring of the source code to prepare.
The source code of todo_list.es6 is following now.
class TodoList extends Cape.Component {
  init() {
    this.ds = new TaskStore();
    this.ds.attach(this);
    this.ds.refresh();
  }

  render(m) {
    m.ul(m => {
      this.ds.tasks.forEach(task => {
        m.li(m => {
          m.class({ completed: task.done });
          m.label(m => {
            m.onclick(e => this.ds.toggleTask(task));
            m.input({ type: 'checkbox', checked: task.done }).sp();
            m.span(task.title);
          });
        });
      });
    });
  }
}
I guess there will be more contents of the method render() later so I separate a part as the method like following.
class TodoList extends Cape.Component {
  init() { ... }

  render(m) {
    m.ul(m => {
      this.ds.tasks.forEach(task => {
        m.li(m => this.renderTask(m, task));
      });
    });
  }

  renderTask(m, task) {
    m.class({ completed: task.done });
    m.label(m => {
      m.onclick(e => this.ds.toggleTask(task));
      m.input({ type: 'checkbox', checked: task.done }).sp();
      m.span(task.title);
    });
  }
}
Now, let’s display the task list of newly added form of the task.
class TodoList extends Cape.Component {
  init() { ... }

  render(m) {
    m.ul(m => {
      this.ds.tasks.forEach(task => {
        m.li(m => this.renderTask(m, task));
      });
    });
    this.renderCreateForm(m);
  }

  renderTask(m, task) { ... }

  renderCreateForm(m) {
    m.formFor('new_task', m => {
      m.textField('title').sp();
      m.btn('Add task');
    });
  }
}
There are new 3 methods in this serialization such as formFor(), textField(), and (). formFor() creates the element <form>. It assign the form’s name on string as the first parameter. The name is used as the value of the attribute name of the element <form>. It must be unique within the component.
<form> as the method form(). But, you need to use formFor() in order to use the convenient methods like val() and paramsFor() that I'll explain later of next lecture.
textField() create the text field. (the element <input type="text">) Assign the field’s name on string as the parameter.
btn() creates the button for general purpose. (the element <button type="button">) Assign the label string as the parameter.
m.button('Add task', { type: 'button' }). But, it's easier if you use the mthod btn().
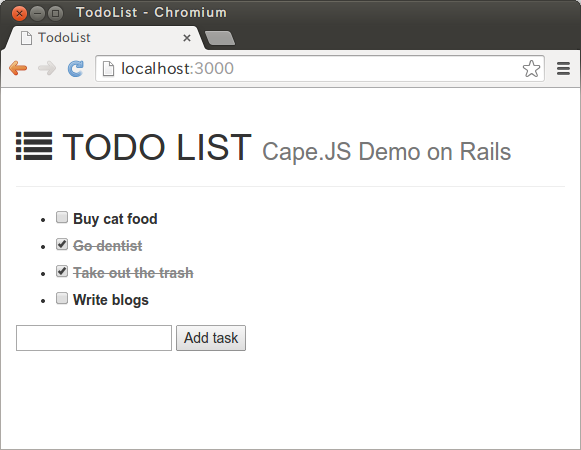
Now, let’s make sure that it works well. Boot the server and access the top page on the browser. The screen will be like following.

Make sure that nothing reacts when you clock “Add task” button just in case.
Well, on the article last but one, I mentioned about it but do you remember that you can mount the expression by back quote in ES6?
Let’s use this technique. Add the code like following to renderCreateForm().
  renderCreateForm(m) {
    m.formFor('new_task', m => {
      m.textField('title').sp();
      m.btn(`Add task #${ this.ds.tasks.length + 1 }`);
    });
  }
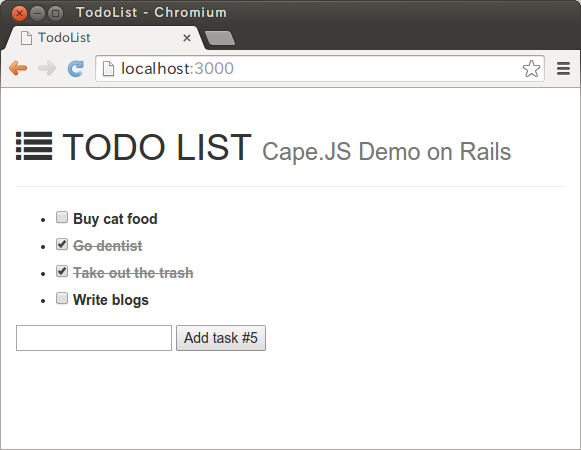
When you write the string of the style ${ ... } in the string surrounded by back quote, the value of the expression is converted to the string and mounted. Here, it mounts the expression this.ds.tasks.length + 1. This expression is the one adding 1 to the number of tasksnow. When you reload the browser, the screen will change like following.

That’s all for today.
On the next lecture, I’ll explain how to implement the functionality to add new task by using this form.