Creating new task - Cape.JS Primer
On this lecture, we implement the functionality to add a task from the form we made on the pvevious lecture.
First, rewrite the component. The source code of renderCreateForm() is now followin now.
  renderCreateForm(m) {
    m.formFor('new_task', m => {
      m.textField('title').sp();
      m.btn(`Add task #${ this.ds.tasks.length + 1 }`);
    });
  }
Rewrite it like following, (add 2 lines)
  renderCreateForm(m) {
    m.formFor('new_task', m => {
      m.textField('title').sp();
      m.onclick(e =>
        this.ds.createTask(this.val('new_task.title')));
      m.btn(`Add task #${ this.ds.tasks.length + 1 }`);
    });
  }
As the result, when you click the botton of form of new added task, it runs the code this.ds.createTask(this.val('new_task.title')).
The method val() of the component returns the value of form field. It passes the string as the parameter of the style x.y. x is the form’s name and y is the field’s name. It requires the value of the field title in the form named new_task here and passes the method createTask() of the data store.
Next, add the method createTask() to the data store. Rewrite task_store.es6 as following.
class TaskStore extends Cape.DataStore {
  constructor() { ... }

  refresh() { ... }

  createTask(title) {
    $.ajax({
      type: 'POST',
      url: '/api/tasks',
      data: { task: { title: title } }
    }).done(data => {
      if (data === 'OK') this.refresh();
    });
  }

  toggleTask(task) { ... }
}
The added method createTask() receives the title of the task as the parameter. It sends it to Ajax by POST method and the if return data is OK, it runs this.refresh().this.refresh() acquires the list of tasks by accessing the API of Rails application and redraws the component.
Next, let’s create API. Open app/controllers/api/tasks_controller.rb on the text editor and rewrite it as following. (add the method create)
class Api::TasksController < ApplicationController
  def index
    ...
  end

  def create
    if Task.create(task_params)
      render text: 'OK'
    else
      render text: 'NG'
    end
  end

  def update
    ...
  end

  private
  def task_params
    params.require(:task).permit(:title, :done)
  end
end
The method Task.create adds the record to the table tasks.
Lastly, it’s finished when you finish writing config/routes.rb. (add :create, on the third line from the bottom)
Rails.application.routes.draw do
  root 'top#index'

  namespace :api do
    resources :tasks, only: [ :index, :create, :update ]
  end
end
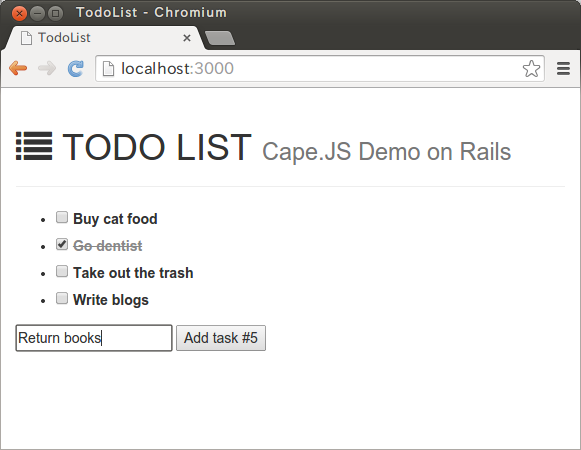
Let’s make sure that it works well on the browser. Add the title of the new task…

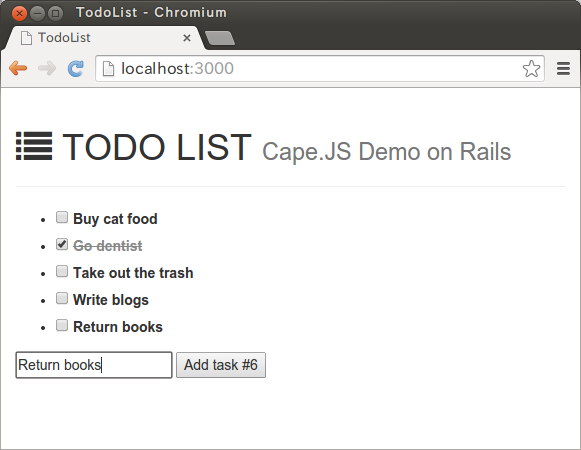
and click the bottton…

It adds the task.
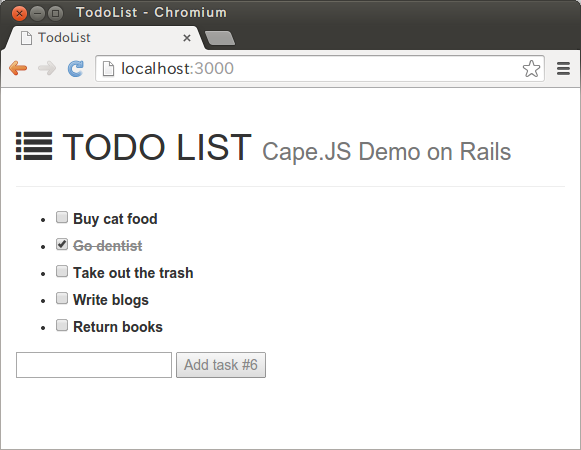
But, it’s a little bit strange. The title written the form is supposed to disapear when adding tasks is done. In order to do so, add the component’s method renderCreateForm().
  renderCreateForm(m) {
    m.formFor('new_task', m => {
      m.textField('title').sp();
      m.onclick(e =>
        this.ds.createTask(this.val('new_task.title', '')));
      m.btn(`Add task #${ this.ds.tasks.length + 1 }`);
    });
  }
The point I changed is fourth line. I changed this.val('new_task.title') to this.val('new_task.title', '').
When number of the parameters is one, the method val() of the component just returns the value of the field. But when it receives the second parameter, it sets the value of the field to the value of the second parameter and then returns the original value of the field. Here, it empties the field title of the form for new task and passes the string written there to the method createTask of the data store.
Let’s make sure it works well on the browser. If the form’s title field gets empty right after adding the task, it’s OK.
Let’s improve one more UI. Now, you can click the button even if the title is empty and it creates the empty task. If the title is empty, let’s disable the button.
First, prepare the style sheet to have clear effect. Rewrite app/assets/stylesheets/todo_list.scss as following (three lines added)
#todo-list {
  label.completed span {
    color: #888;
    text-decoration: line-through;
  }
  button[disabled] {
    color: #888;
  }
}
Then, change the component’s method renderCreateForm() as following.
  renderCreateForm(m) {
    m.formFor('new_task', m => {
      m.onkeyup(e => this.refresh());
      m.textField('title').sp();
      m.attr({ disabled: this.val('new_task.title').trim() === '' });
      m.onclick(e =>
        this.ds.createTask(this.val('new_task.title', '')));
      m.btn(`Add task #${ this.ds.tasks.length + 1 }`);
    });
  }
I added two lines. I inserted m.onkeyup(e => this.refresh()); in order to redraw the component every time the contents of the title field is changed.
The event keyup breaks out when a key on the keyboard is released.
It also breaks out when the string is pasted by the user.
Another added code is following.
m.attr({ disabled: this.val('new_task.title').trim() === '' });
It seems a little bit complicated but it’s simple. It assigns the attribute disabled to the button if it’s empty after deleting both side blanks of the title field by trim().
Every time when the user rewrites the content of the title field, it redraws the whole component. If the content it empty, it’s disabled and if nor, it’s enabled.
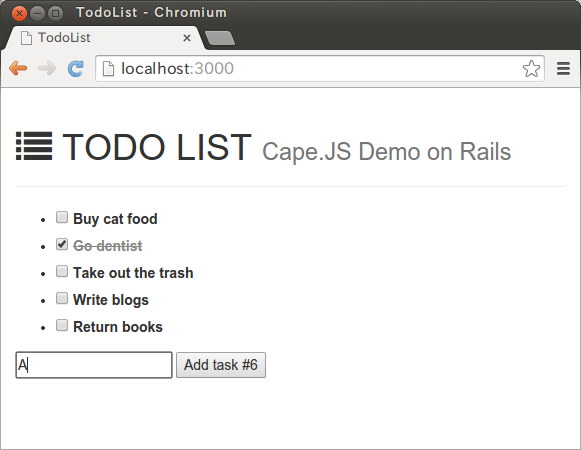
On the screen right after reloading the browser, the button is disabled like following.

But, when you add one letter “A” on the title field,

The button is enabled. And then, when you delete “A”, it’s disabled again.

It’s relatively annoying if you make this kind of effect happen in jQuery. Virtual DOM can contribute well.
On the next lecture, I’ll create the function to rewrite the task’s title.